I once spent four hours in a freezing downpour on the Cuillin ridge, trying to squeeze a frozen, half-empty hydration bladder through a tiny straw while my fingers were too numb to work the bite valve. It was a miserable, dangerous lesson in why the “convenience” of a bladder isn’t always worth the headache. Most gear reviews make it sound like a simple choice between two shiny gadgets, but when you’re actually out there, knowing how to choose a water bottle or bladder becomes a question of access, temperature, and how much you trust your own hands when the weather turns foul.
I’m not here to sell you on the latest high-tech reservoir with a built-in filter just because a marketing team said it’s revolutionary. Instead, I’m going to give you the unvarnished truth based on two decades of carrying weight through wind, rain, and grit. I’ll talk about weight, ease of cleaning, and—most importantly—how these systems actually perform when the temperature drops below freezing. If I haven’t personally struggled with a piece of kit on a long route, I won’t tell you it’s good.
Table of Contents
Capacity for Long Distance Hiking Without the Weight Penalty
When you’re planning for multi-day treks, the math of weight versus volume becomes your most constant companion. I’ve spent years calculating exactly how much water I need to carry between reliable sources, and I’ve learned the hard way that over-preparing for capacity can lead to a heavy pack that ruins your pace before you even hit the first ascent. For most of my long-distance routes, I aim for a total capacity for long distance hiking that sits around two to three litres, but how that weight is distributed matters more than the total amount.
I usually opt for a 2-litre bladder in my pack for steady sipping, supplemented by a smaller handheld bottle for when the terrain gets technical. I’ve used this specific 2-litre reservoir for four seasons of heavy rain and high-altitude sun; it’s reliable, though you have to be disciplined about water bladder maintenance tips like thorough drying, or you’ll be drinking mould by day three. If you are looking at lighter setups, the debate between a hydration reservoir vs handheld bottles usually comes down to how much you value constant access versus the ability to grab a quick drink without stopping to adjust your shoulder straps.
Hydration Reservoir vs Handheld Bottles Picking Your Pace
When you’re moving fast on a technical descent or a steady ridge scramble, the choice between a hydration reservoir vs handheld bottles usually comes down to how much you value constant access versus fine-tuned control. I’ve used the Osprey Hydraulics bladder for nearly five years now, through everything from humid summer valley walks to freezing winter scrambles. It is unbeatable for keeping your hands free to use trekking poles or steady yourself on loose scree. However, the trade-off is that you’re often sipping through a straw, which can be a struggle when the wind is howling and you’re trying to manage your core temperature.
On the other hand, I’ve found that handheld bottles are the best hydration systems for trail running or those days when you’re pushing a much higher pace on well-defined paths. I carried a pair of Salomon soft flasks through a twenty-mile loop in the Lake District last autumn; they allow you to control exactly how much you drink and, more importantly, you can swap them out easily if one runs dry. The downside is the constant motion of the water hitting your hands, which can be distracting if you’re trying to focus on foot placement.
Five Hard Lessons from the Trail
- Don’t trust the bladder capacity alone. I’ve carried a 3-litre reservoir through four days of dry, high-altitude trekking in the Pyrenees, and I still found myself scraping the bottom of the bag by mid-afternoon because I underestimated my sweat rate. Always carry a secondary, smaller bottle for when the bladder inevitably runs dry or the hose gets a puncture.
- Test the bite valve in the cold before you’re on a ridge. I’ve spent many an afternoon in the Cairngorms trying to suck water through a frozen tube while my fingers were numb; if you’re using a bladder, make sure you can insulate the hose or at least know how to clear the ice without losing your temper.
- Weight isn’t just the empty container; it’s the water itself. I’ve seen people obsess over a 50g weight saving on a new plastic bottle, only to pack an extra litre of water they didn’t need because they didn’t account for the actual weight of the liquid. Plan your refills based on known water sources, not just the capacity of your kit.
- Check the accessibility when you’re wearing layers. I’ve used the same lightweight bladder for six seasons now, and while it’s great for keeping weight centered, it’s a nightmare to refill if you’re wearing a heavy hardshell and a thick mid-layer in a downpour. If you can’t reach the hydration port without stripping off your protection, you’re going to get cold.
- Avoid “novelty” bottles with complex straw systems. I’ve watched groups struggle with complicated lid mechanisms during quick breaks, turning a five-minute rest into a twenty-minute faff. Stick to simple, reliable designs—if it takes more than a few seconds to get a drink, it’s going to fail you when the weather turns and you need to move quickly.
The Cost of a Single Decision
I’ve seen people realize they’re out of water only when the sun is hitting the ridge and the temperature is climbing, and by then, the decision between a bladder or a bottle isn’t about convenience anymore—it’s about whether you have the energy left to fix a mistake you made three hours back at the trailhead.
Bridget Halloran
Making the Final Call
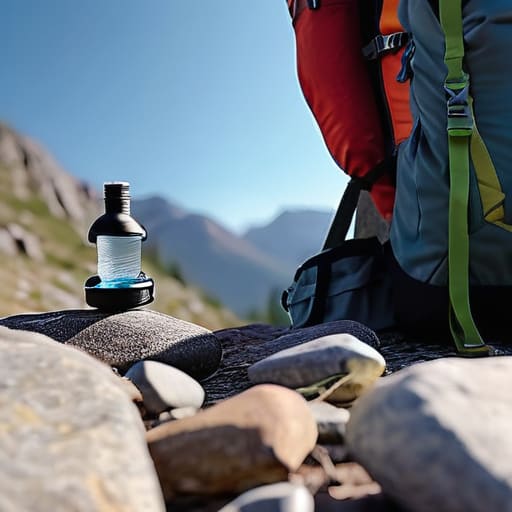
Ultimately, there isn’t a single “correct” way to carry water; there is only the way that works for your specific route and your specific body. If you are tackling a long, steady approach where you need to sip constantly without stopping, a bladder is your best friend. But if you are moving fast over technical terrain or navigating a ridge where you need to reach for a bottle without fumbling with a hose, stick to handhelds or side pockets. I’ve spent years testing both, and I’ve learned that over-complicating your hydration is a quick way to end up dehydrated or frustrated. Weigh your options against the expected temperature, the terrain, and how much effort you want to spend managing your gear versus enjoying the view.
At the end of the day, the best piece of kit is the one that stays out of your way when things get difficult. I have seen too many people carry a massive, high-capacity reservoir into a high-altitude scramble only to find it’s a heavy, awkward liability when the wind picks up and the light starts to fade. Don’t let an optimistic gear list dictate your movement. Choose what fits your pace, pack more than you think you need, and always respect the thirst that comes with a hard day’s walk. The mountains don’t care what you’re drinking out of, as long as you’re prepared for when the weather turns.
Frequently Asked Questions
How do I stop my bladder hose from freezing during a winter ascent or a high-altitude trek?
I’ve dealt with frozen hoses on three separate winter traverses in the Cairngorms, and it’s a miserable way to spend a summit attempt. First, keep the bladder inside your pack, tucked deep against your back where your body heat can reach it. Most importantly, don’t leave the hose dangling outside. I use a short, insulated sleeve I’ve used for four seasons, but even then, you must blow air back through the tube after every sip to clear the residual water.
Is it worth the extra weight of a larger reservoir if I'm planning a route with limited water sources?
It’s a trade-off between weight and the mental cost of uncertainty. I’ve carried a 3-litre bladder on a dry ridge in the Peak District when the streams had all gone bone-dry; it’s heavy, but it beats the panic of a dry throat at 2,000 feet. If your route is truly water-scarce, take the extra capacity. I’d rather deal with an extra 800g in my pack than spend two hours searching for a spring that isn’t there.
How do I clean a bladder properly so it doesn't develop that permanent, metallic smell after a few weeks of use?
The smell is usually biofilm—bacteria clinging to the walls. I’ve used my Osprey bladder every week for three seasons, and if I don’t clean it immediately after a trip, it gets that metallic tang. Use a dedicated cleaning tablet or a mix of water and a tiny bit of unscented soap. Scrub the corners with a long brush; that’s where the rot starts. Most importantly, hang it to dry completely in a well-ventilated spot. Never, ever pack it away damp.