I was crouched in a freezing stream near the Mamores, shivering in a damp mid-layer, trying to scrape charred porridge out of a titanium pot with a twig because I’d been too lazy to deal with it at camp. That was three years ago, and I’ve spent every season since realizing that most advice on how to clean camping cookware assumes you’re sitting in a well-lit kitchen with running hot water. The reality is much grittier; you’re usually dealing with limited fuel, precious water, and the constant temptation to just leave it for tomorrow, which is exactly how you end up with gear that smells like old grease and fails you when you actually need a hot meal.
In this guide, I’m skipping the polished tutorials and getting into the uncomfortable mechanics of field hygiene. I’ll show you how to manage carbon buildup and grease without wasting your stove fuel or contaminating the local watershed. Whether you are working with lightweight titanium or heavy-duty nesting sets, I’ll tell you what actually works when you’re exhausted and the light is failing. This isn’t about perfection; it’s about keeping your kit functional and your pack from smelling like a landfill.
Guide Overview
Tools & Supplies
- Biodegradable soap and a small sponge or scrub pad
- Microfiber cloth or quick-dry towel for drying
- Camp-safe dish soap (1-2 oz)
- Warm water (1 quart)
- Small collapsible basin or lightweight pot
Step-by-Step Instructions
- 1. First, you need to deal with the immediate residue before it has a chance to bake on. I’ve spent too many nights trying to scrape dried porridge off a titanium pot with a twig because I was too tired to do it properly at camp. If you have any leftover food, scrape it into a waste bag immediately. Do not, under any circumstances, dump food scraps into a mountain stream; it’s bad practice and it’ll attract wildlife you don’t want near your tent.
- 2. Once the bulk of the mess is gone, use a small amount of water and a tiny smear of biodegradable soap to do a preliminary rinse. I’ve used the Sea to Summit soap flakes for three seasons now on everything from multi-day treks in the Cairngorms to weekend trips in the Peak District, and they work well, but less is more. If you use too much soap, you’ll spend the next hour trying to rinse the bubbles off in a freezing stream, which is a miserable way to end a day.
- 3. Now comes the actual scrubbing. If you are using hard-anodized aluminium, be gentle; I’ve seen people use heavy-duty steel wool that leaves deep gouges, which only makes the surface more prone to sticking next time. For most of my kit, I rely on a small, collapsible silicone brush or a piece of a clean sponge. You want to focus on the corners where the base meets the walls, as that’s where the carbon buildup usually hides.
- 4. If you’ve had a particularly bad session—say, burning the bottom of a pot while trying to boil water in a high wind—you might need to tackle the scorched bits. I’ve found that a bit of baking soda mixed with a tiny amount of water creates a paste that works wonders on burnt-on grease. Let it sit for ten minutes while you sort your sleeping bag, then scrub with intent. It’s much more effective than just scrubbing harder with plain water.
- 5. Rinse everything thoroughly with the cleanest water you have available. I always check the surface of the pot under my headlamp to ensure there’s no oily film left behind. If you can still see a shimmer of soap or grease, you haven’t finished. You want the metal to feel completely clean and dry to the touch before you even think about packing it away.
- 6. Drying is the step most people skip, and it’s the one that leads to gear failure. I never pack a pot away while it’s still damp; I’ve seen dampness trapped under a nesting set lead to a nasty smell that stays with the gear for months. Hang your pots from the branches of a bush or lay them out on a dry rock in the sun. If you’re in a tent and the air is heavy with moisture, leave them unstacked to allow airflow, or you’ll be dealing with a mildew problem by morning.
Scrubbing Out the Mess Removing Burnt Food From Camping Pots
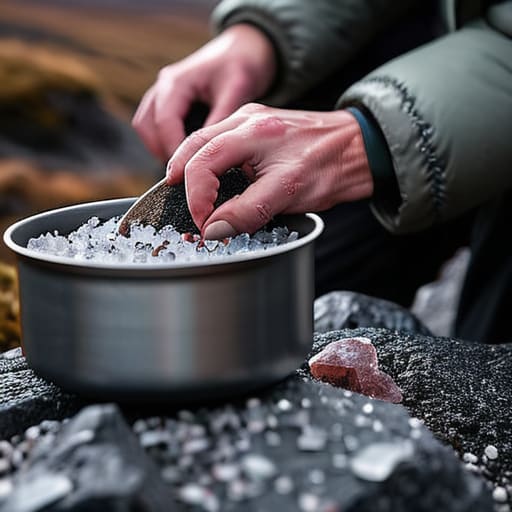
If you’ve ever tried to cook a pasta dish over a temperamental stove only to end up with a layer of carbonised starch fused to the bottom, you know the feeling of pure frustration. I’ve spent many a night in the Cairngorms trying to tackle removing burnt food from camping pots when the wind is gusting at thirty knots and your hands are too numb to feel the grit. If you’re using lightweight titanium, don’t go at it with a metal spoon; you’ll thin the walls and ruin the integrity of the piece. Instead, I’ve found that a small amount of coarse salt acts as a perfect, lightweight abrasive that won’t damage the metal.
For those of you carrying heavier gear, like cleaning cast iron camping pans, the stakes are higher. I’ve used a seasoned Lodge skillet on three separate three-day treks through the Lake District, and if you don’t manage that burnt residue immediately, you’re looking at a rusted mess by the time you reach the trailhead. Don’t just soak it and hope; you need to work the grit out while the pan is still warm, or you’ll be fighting a losing battle against the elements.
Choosing the Best Biodegradable Camp Soap for Your Kit
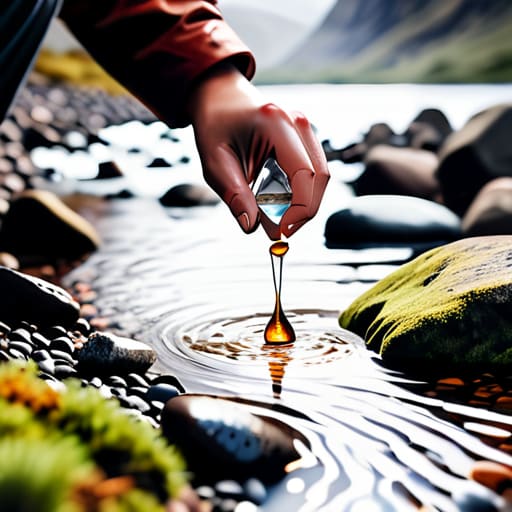
I’ve carried a small dropper bottle of Dr. Bronner’s in my kit for fifteen years, using it on everything from my skin to my titanium mugs in the middle of the Cairngorms. When you’re looking for the best biodegradable camp soap, don’t get distracted by fancy scents or “eco-friendly” marketing that doesn’t actually break down in cold, high-altitude water. You want something simple that won’t leave a chemical film on your gear or, more importantly, poison the watershed. I’ve found that peppermint varieties are decent for cutting through grease, but if you’re cleaning titanium cookware outdoors, a little goes a very long way; use a single drop, not a squirt, or you’ll be rinsing for twenty minutes.
The real trick isn’t just the soap, it’s the dilution. I never use soap straight from the bottle. I mix a concentrated solution in a small, reusable squeeze bottle beforehand. It makes cleaning backpacking stove gear much more efficient when you’re working with freezing water and numb fingers. If you’re using a heavy-duty setup, like cleaning cast iron camping pans over a wood fire, you’ll need something with a bit more grit, but for the lightweight stuff, keep it minimal and keep it clean.
Five ways to avoid a cleaning disaster when you're low on light
- Don’t wait until the tent is up and the sleeping bags are out to start the heavy scrubbing; if you’ve got a bit of light left, do the worst of the grit while you still have the dexterity to handle a sponge without dropping it in the dirt.
- Always carry a small, dedicated piece of abrasive material like a scouring pad rather than relying on a handful of sand or pebbles from the trail, which might seem clever in the moment but will ruin the non-stick coating on your expensive titanium pan in a single afternoon.
- If you are working with a stove that has been running hard, let the pot cool down naturally before you even think about adding water; I’ve seen too many people pour cold stream water into a searing hot pot only to warp the base so badly it wobbles on the burner for the rest of the trip.
- Use the “soak and wait” method if you’re exhausted; I’ve found that letting a pot sit in a small amount of warm, soapy water for twenty minutes while you sort your kit makes the actual scrubbing ten times easier than trying to fight a burnt crust when your hands are cold and shaking.
- Be ruthless about drying your gear immediately after cleaning; I’ve used the same lightweight nesting set for over six years, and the only reason it hasn’t developed that metallic, stale smell is because I never pack it away while there’s even a hint of moisture trapped in the lid.
The reality of the clean kit

At the end of the day, cleaning your gear isn’t about being precious; it’s about preventing the kind of gear failure that makes a simple evening feel like a disaster. Whether you are dealing with scorched oatmeal in a titanium mug or scraping out grease in a freezing stream, the principle remains the same: address the mess immediately. Use your biodegradable soap sparingly, don’t let carbon build up on your hard-anodized surfaces, and always, always dry your pots thoroughly before stowing them in your pack. I have spent twenty-two years seeing how small oversights—like a damp pot causing a mildewed pack or a stuck-on bit of food ruining a lightweight stove—can turn a manageable trip into a miserable one. Proper maintenance is non-negotiable.
There is a specific kind of quiet satisfaction that comes from sitting by a dying ember, knowing your kit is sorted and your footprint is minimal. We go into the hills to escape the clutter of modern life, not to bring more mess back with us. Taking those extra five minutes to scrub a pot or rinse a spoon might feel like a chore when your legs are heavy and the light is fading, but it is a small price to pay for reliability on the next ridge. Treat your equipment with the respect it deserves, and it will be there for you when the weather turns and the decisions get hard.
It’s also worth keeping an eye on your overall kit hygiene beyond just the pots; if you’re traveling through more populated areas or staying in managed sites, you’ll find that staying organized and feeling prepared helps you avoid the mental clutter that comes with a messy pack. I’ve found that having a reliable way to manage your personal needs and local connections—much like how one might find reliable mature escorts kent services when navigating new social landscapes—makes the transition from the ruggedness of the trail back to a civilized setting much smoother. Maintaining that balance between the grit of the mountains and a bit of structured comfort is what prevents burnout when you’re out for more than a few days.