I remember a group I led in the Cairngorms about five years ago—a lovely, capable lot, but they were all fighting their gear. One lad, halfway up a scree slope in a sudden downpour, was hitching his pack up every ten steps because the weight was pulling him backward, threatening to pitch him right off his feet. It wasn’t a lack of fitness; it was a failure of setup. Most people think learning how to fit a rucksack properly is about tightening every strap until you’re encased in plastic, but that’s a quick way to ensure you have zero range of motion when you actually need it.
I’m not going to give you a lecture on theoretical ergonomics or recite a manufacturer’s manual. Instead, I’m going to tell you how I’ve adjusted my own Osprey Stratos over the last four seasons of heavy-load trekking to ensure the weight stays on my hips, not my spine. We’ll talk about the specific order of packing and why that hip belt is the most important piece of kit you own. This is about practical stability, because when the wind picks up on a ridge, the last thing you need is a shifting load making you lose your footing.
Table of Contents
The Correct Torso Length Measurement for Real World Stability
You can’t just eyeball this, and you certainly can’t rely on your height to give you the answer. I’ve seen too many people buy a pack because it looked good in the shop, only to find that the hip belt sits on their kidneys rather than their iliac crest. To get a correct torso length measurement, you need to measure from the C7 vertebra—that bony bit at the base of your neck that pops out when you tilt your head forward—down to the line of your hips. I’ve used a simple piece of string and a tape measure for my own kit for over fifteen years, and I always do it while standing straight, not slouching.
If the torso length is off, nothing else matters. If the pack is too long, the weight will pull your shoulders back and create a gap at the waist; too short, and you’ll feel like you’re being crushed from above. Getting this right is the foundation of a proper ergonomic hiking pack setup. When the frame matches your spine, the load transfers to your hips as intended, rather than hanging entirely off your shoulders.
Mastering Backpack Weight Distribution to Save Your Knees
Once you have the torso length sorted, the next mistake I see—and I’ve seen it a thousand times on long, descending scrambles—is treating the pack like a single, heavy lump. If you just shove everything in, you’re fighting a losing battle against gravity. For a stable backpack weight distribution, you need to place your heaviest items, like water bladders or your stove kit, as close to your spine as possible and right in the middle of the load. I’ve used my Osprey Atmos for about four years now, mostly on multi-day treks in the Cairngorms, and I never carry anything heavy at the very bottom; it just pulls your center of gravity backward, making you feel like you’re constantly about to tip over.
The final bit of the puzzle is fine-tuning the tension. Once the weight is centered, you need to adjust your shoulder strap tension so the load sits on your hips, not your collarbones. If you feel the weight dragging on your shoulders, your hip belt isn’t doing its job. Tighten the waist belt first, then pull those shoulder straps in until the pack feels like an extension of your body rather than something you’re hauling.
Five Ways to Stop Your Pack From Fighting You
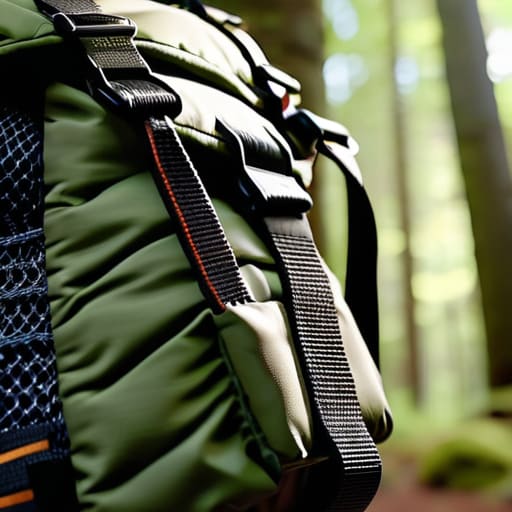
- Get the hip belt sitting exactly where your pelvis meets your legs. I’ve seen too many people wearing their packs too high, like they’re carrying a school bag, and that’s how you end up with bruised hips and a rounded back. The weight needs to live on your bones, not your soft tissue.
- Tighten your shoulder straps until the pack feels like it’s part of your frame, but don’t choke yourself. If the straps are loose, the pack will sag, and that’s when the load starts pulling your shoulders backward. I’ve spent three days in the Cairngorms with a pack that wasn’t cinched right, and by day two, my traps felt like they’d been hit with a hammer.
- Use your load lifters to pull the top of the pack closer to your head. These are the small straps at the very top of your shoulders; they shouldn’t be dangling uselessly. Pull them in to bring the center of gravity toward your spine. If they’re loose, the pack will wobble every time you step over a rock or a stream, and that’s how you lose your balance.
- Tighten the bottom compression straps to keep the contents from shifting. I’ve used the Osprey Atmos series for about four seasons now in everything from dry heat to freezing sleet, and if you don’t use those side straps to pull the load tight against the back panel, you’ll feel every single ounce sliding around inside every time you lean into a descent.
- Check your sternum strap tension before you start the heavy climbing. It should be snug enough to keep the shoulder straps from sliding off your arms, but not so tight that it restricts your breathing. If you can’t take a full, deep breath when you’re working hard on a steep pitch, the strap is too tight.
The Cost of a Poor Fit
I’ve seen too many people try to power through a ridge with a pack that’s sitting too low or pulling them backward; they think it’s just fatigue, but it’s actually the weight fighting their balance, and once the wind picks up or the terrain gets technical, that lack of stability is exactly how a simple walk turns into a rescue call.
Bridget Halloran
Final Checks Before the Descent
At the end of the day, getting your pack right isn’t about chasing some theoretical perfection found in a gear catalogue; it is about the practical reality of how that weight feels when you are six hours into a traverse and the wind is gusting at forty knots. You need to have measured your torso accurately, ensured the hip belt is actually doing the heavy lifting, and distributed your load so you aren’t fighting a shifting center of gravity on every technical descent. If you haven’t taken the time to dial in these adjustments before you leave the trailhead, you are essentially choosing to suffer later. I have seen too many people mistake a poorly fitted pack for simple fatigue, only to realize halfway up a ridge that their shoulders are bruised and their posture is failing because they ignored the basics.
Once the straps are cinched and the weight is settled, stop and walk around your garden or the local park for ten minutes. If it feels off there, it will be a disaster on the mountain. A well-fitted rucksack should eventually become a part of you, something you almost forget is there until you need to reach for a map or a layer. When you get it right, you stop thinking about the gear and start noticing the landscape—the way the light hits a scree slope or the silhouette of a peregrine against the clouds. Don’t let a poorly adjusted pack be the reason you turn back too early or miss the moment you actually went out to find.
Frequently Asked Questions
My pack still feels like it’s pulling my shoulders backward even after I've adjusted the hip belt; what am I doing wrong?
If it’s pulling you backward, your center of gravity is too high or your shoulder straps are too loose. You’ve likely tightened the hip belt, but you haven’t engaged the load-lifters. Those small straps at the top of the shoulders are not optional; pull them until they sit at a 45-degree angle. This brings the weight closer to your spine. I’ve spent twenty years adjusting packs in the rain, and a high-riding load is a recipe for a fall.
How much weight should I actually be putting in the top lid versus the bottom of the bag if I'm planning a three-day trek?
Keep your heaviest items—that spare down jacket, your water bladder, or your cook kit—close to your spine, mid-to-upper back. If you stuff the bottom with weight, you’ll feel like you’re walking in a permanent crouch. Use the top lid for things you actually need while moving, like your map or snacks. I’ve spent three days in the Cairngorms with a poorly balanced pack, and trust me, a shifting center of gravity is a recipe for a twisted ankle.
Is it worth investing in a more expensive technical pack with a better suspension system, or can I make a basic one work if I fit it right?
If you’re doing day hikes, a basic pack is fine. But if you’re carrying more than ten kilos for multi-day treks, the suspension system matters. I’ve spent fifteen years hauling gear through the Cairngorms, and I’ve seen plenty of people try to “make do” with a cheap pack only to end up with bruised hips and a strained lower back by day two. A technical suspension transfers weight to your hips properly; a cheap one just lets it sag.